Bullet journal landscape page layouts are easy to create with The Grid Tool. Do you like to turn your notebook to have more room across the page sometimes? I do!
Using a rectangular page in a horizontal or “landscape” format (with the long side parallel to your body) can make it much easier to create many trackers, calendars, or other long grids with multiple columns.
I’ve already created many tutorials and videos on how to use The Grid Tool with your page in “portrait” orientation. However, I haven’t made many (maybe any?) showing how to use it in ‘landscape’ orientation yet – so that changes today.
Bullet Journal Landscape vs. Portrait Page Layouts
When we use a journal or book, we usually open it with the binding perpendicular (90 degrees) to our bodies. This makes it easy to hold each side in our left and right hands, respectively.
We also tend to write in our notebooks from top to bottom – again, with the page in “portrait” orientation. It’s how we’re first taught how to write and read.
However, artists often change the orientation of their sketchbook pages and canvases one way or the other. Depending upon the subject of their study, they may prefer a taller space to draw a “portrait”. Or they may want to emphasize the grand scale of a mountainscape in “landscape”.
And look at your phone – you probably use it in “Portrait” orientation for reading or writing most of the time. But many people turn it 90 degrees to “Landscape” mode to watch movies or take photos (other than selfies, of course).
Why Use Bullet Journal Landscape Page Layouts?
It’s easy to find bullet journal page layout ideas and examples on pages in “portrait” orientation.
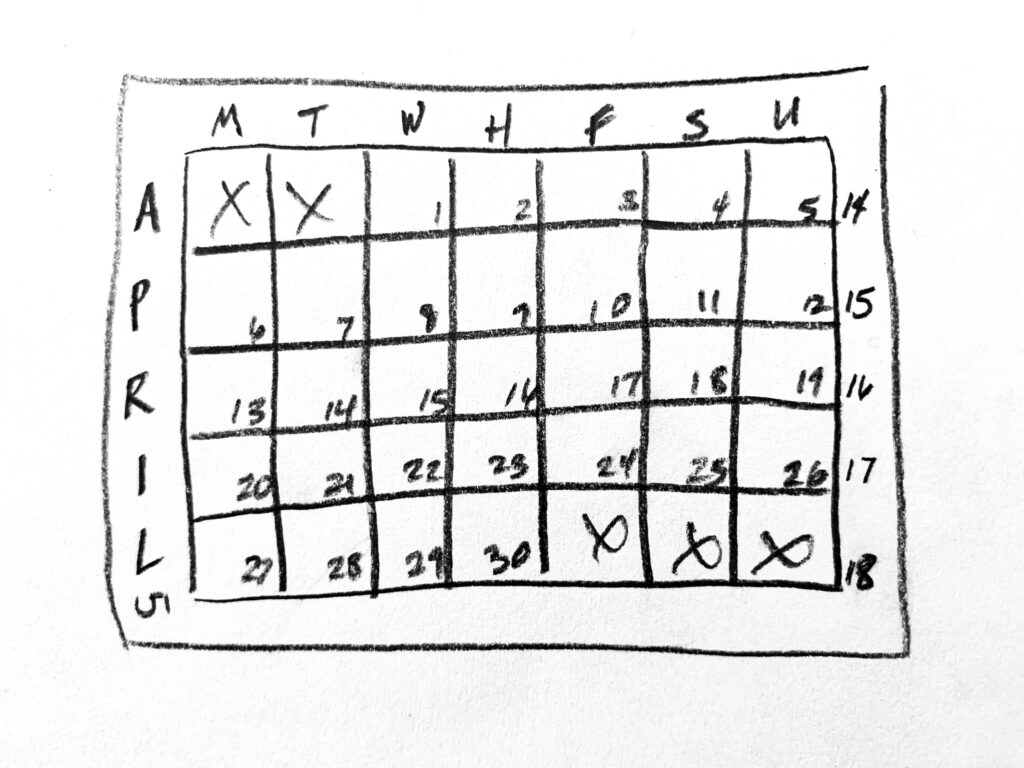
However, sometimes a tracker or calendar fits better on a page with more space left-to-right. For example, you can “wrap” a very long string of numbers (like a monthly log with 28-31 days total) across several “lines” down the page in portrait orientation. But on a page that’s long enough from left to right, you could lay all of them out end-to-end. On a page in landscape orientation, you’d have no “line-break” interruptions across the expanded width.
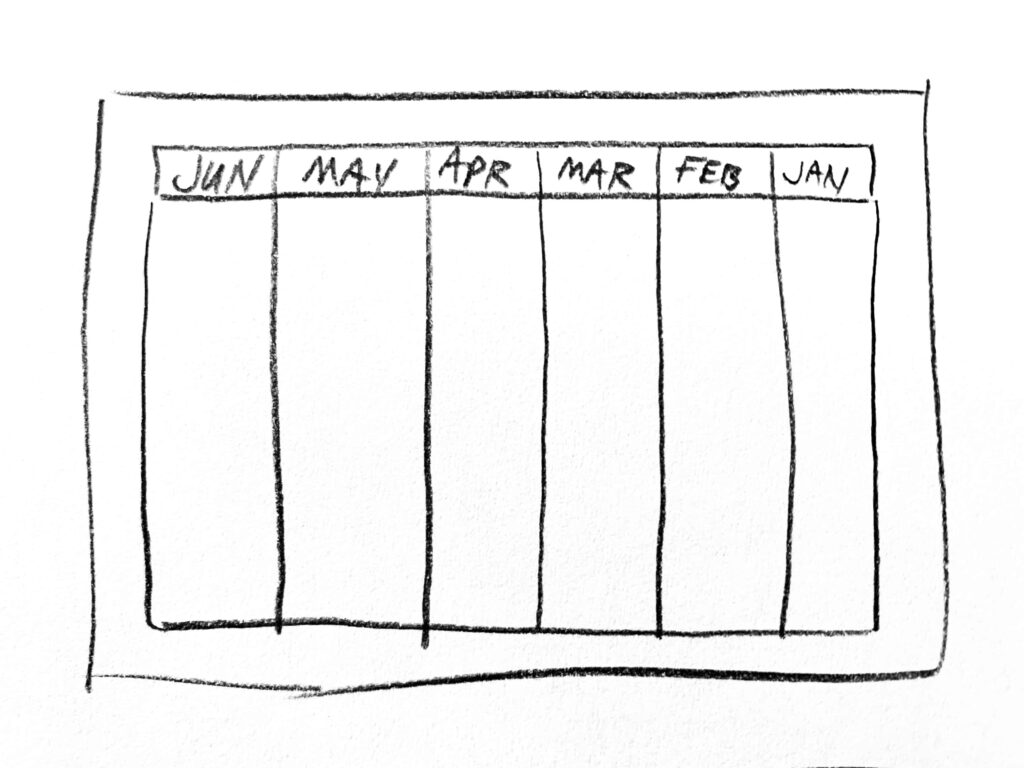
But even if you don’t have a long chronological list, your layout may look and feel better in landscape. For example, a 6-month Far Future log can be laid out across a landscape page in order. If your native language reads left-to-right, the same left-to-right orientation of time (the months) feels intuitive. And if your native language reads right-to-left (like Japanese, for example), you can just reverse the layout of the months (like I’ve shown in this sketch)!
And even better – if you don’t use “landscape” orientation often, turning your page can “shake loose” more creativity. You’re forced to think about how you use the space, which will change the way you approach the page. This can help you unlock ideas and even revelations about how and what you choose to bullet journal.
How to Use The Grid Tool for Landscape Page Layouts
The good news is The Grid Tool absolutely can be used with your page in either “portrait” or “landscape” orientation.
The basic premise is you’ll do the opposite of every “portrait-based” tutorial or video showing you how to use The Grid Tool. You’ll also swap the rows (left to right) and columns (up and down).
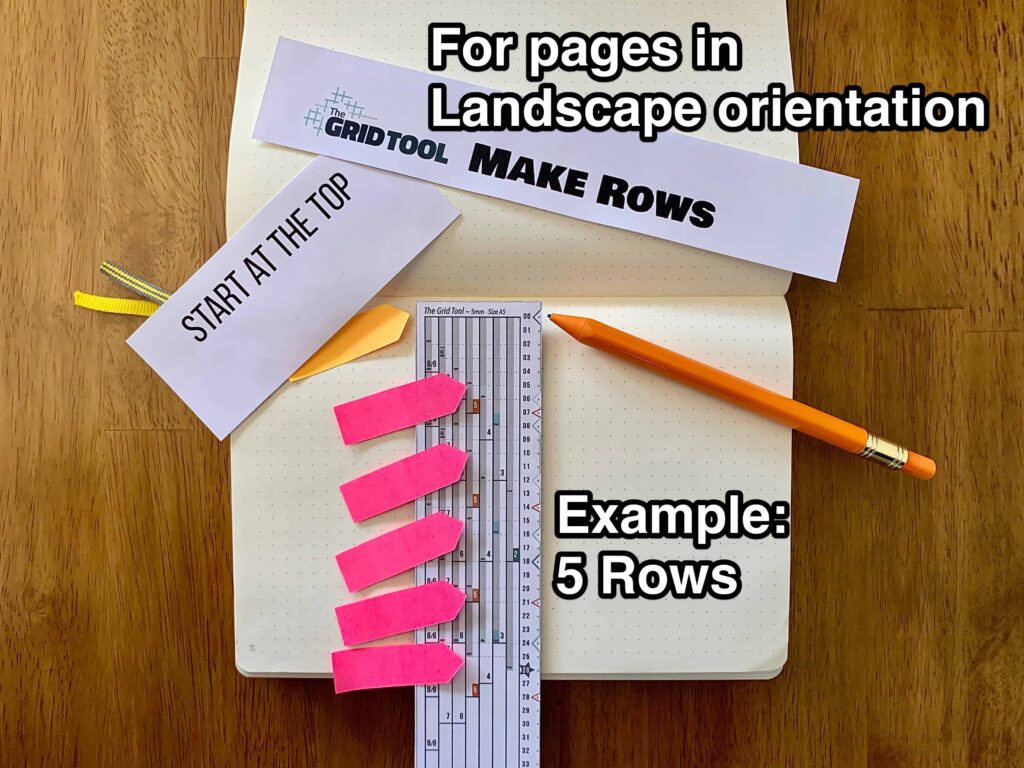
How to Make Rows on a Landscape-oriented Page
For example, when I say to turn The Grid Tool on its side (left-to-right horizontally) and use the shaded sections to create columns down the “portrait” oriented page, you’ll do the exact opposite. You’ll hold it upright (not turn it), and use the shaded sections to create rows across the “landscape” oriented page.
In the example here, I show you where you need to look on The Grid Tool to find the “5” shaded sections, so you can make 5 Rows. The orange arrow flag shows you where to place your first mark. And the other pink flags show you where to put the other 5.
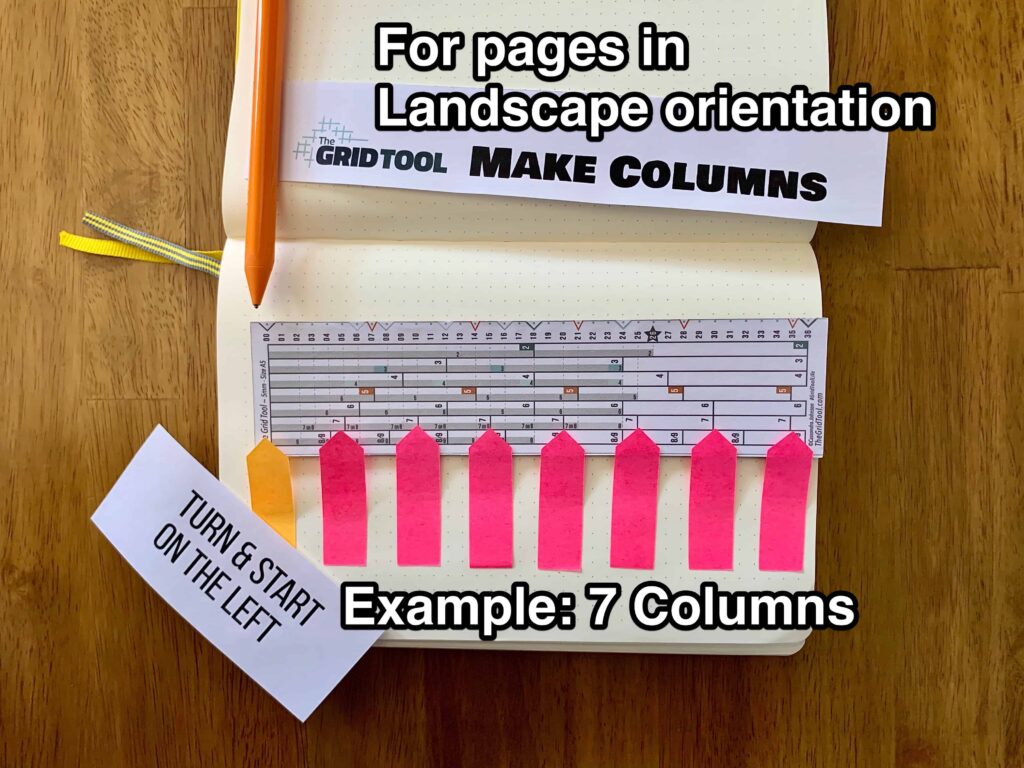
How to Make Columns on a Landscape-oriented Page
Similarly, to make columns across the “landscape” oriented page, you’ll turn it on its side to use the sections with the larger numbers.
And this example shows you where to find the “7” sections on The Grid Tool to help you make seven columns. Again, the orange arrow flag shows you where to place your first mark. And the other pink flags show you where to put the other seven.
You’ll also notice when using The Grid Tool in “landscape” orientation, the numbers are turned 90 degrees on their sides. I had to pick one or the other orientation when designing it. The Grid Tool is most often used with pages in “portrait” orientation for bullet journaling. So I chose to orient the numbers upright when using it in that manner.
However, that doesn’t mean it couldn’t be designed the other way.
So – I’m currently working on a version that turns the numbers 90 degrees. This orients them upright for anyone who uses The Grid Tool with landscape-oriented paper more often than portrait.
Which paper orientation do you prefer – portrait or landscape? Or does it depend on the layout you’re trying to achieve? What kinds of layouts do you prefer to create in landscape orientation over portrait? Contact me and let me know!