Want to know how you can use The Grid Tool with any notebook, journal, or flat surface to divide it into even sections? It’s as easy as following these three steps:
#1 Decide How Many Sections You Want
First: Determine your Goal. decide if you want to divide your page in half, thirds, fifths, or…?
With The Grid Tool, you can choose any amount from 2-9 to make:
• halves,
• thirds,
• quarters,
• fifths,
• sixths,
• sevenths,
• eighths, or
• ninths
The number of sections or divisions you make will depend on what your ultimate goal is. Find the middle so you can split it in two? Or are you making a grid to use as a health tracker? A divider for different aspects of your daily pages? How about a monthly calendar?
How To Make A Monthly Calendar With The Grid Tool
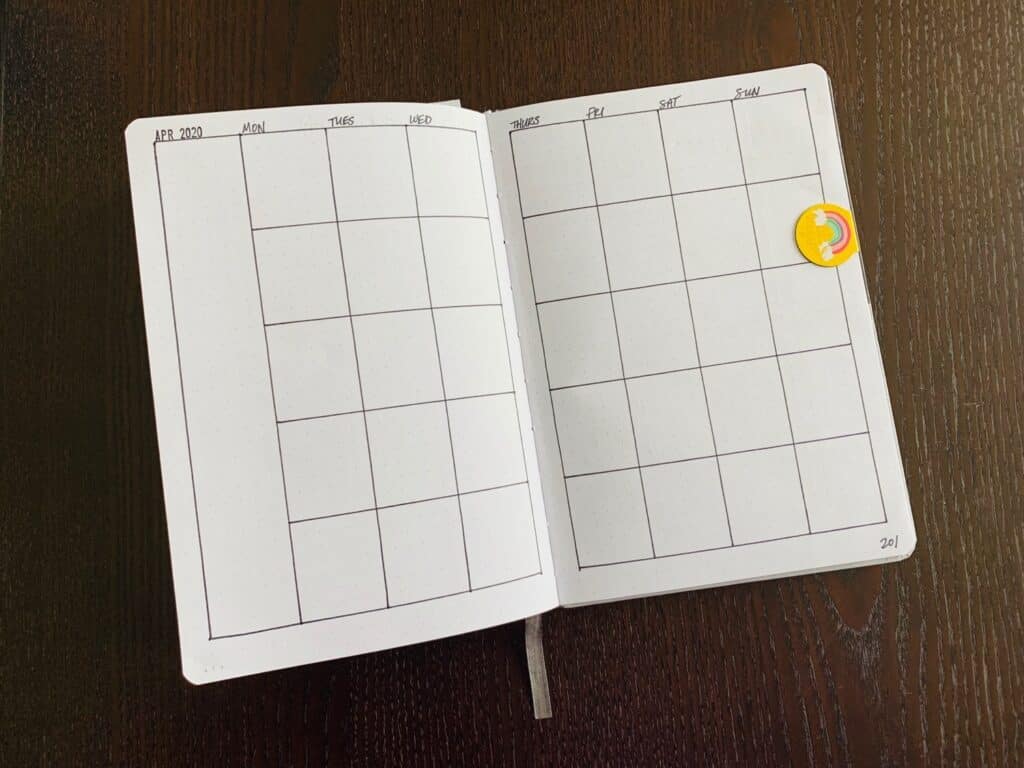
For example, let’s make a monthly calendar 2-page spread in a size A5 dot grid notebook. We’ll use The Grid Tool 5mm ~ Size A5.
We want 7 days of the week spread across our two pages in columns with a Monday start. We also want one column to the left of our day columns to put monthly notes, tasks, or goals.
Our 7 days plus 1 extra column is 8 total columns. Since we decided to spread those 8 columns across not just one but two pages, we need to divide them in two. This means we’ll make 4 columns on each page. Let’s keep that number four in mind as we move to step 2:
#2Use The Grid Tool to See Your Sections
Second: Look at The Grid Tool and find the number of sections you want.
For our example, we’re making 4 columns. So we hold The Grid Tool horizontally on the page (left to right). Looking in the shaded sections we can see the number “4” at dots 06, 12, 18, and 24. These smaller ‘column’ numbers are facing upright (the ‘row’ numbers are larger and now sideways). We’ll use the space between 00 and 24 for all four of our columns. The dividing lines between them will be at 06, 12, and 18.
That was easy, right? OK – on the last step:
#3 Place Marks and Make Your Grid
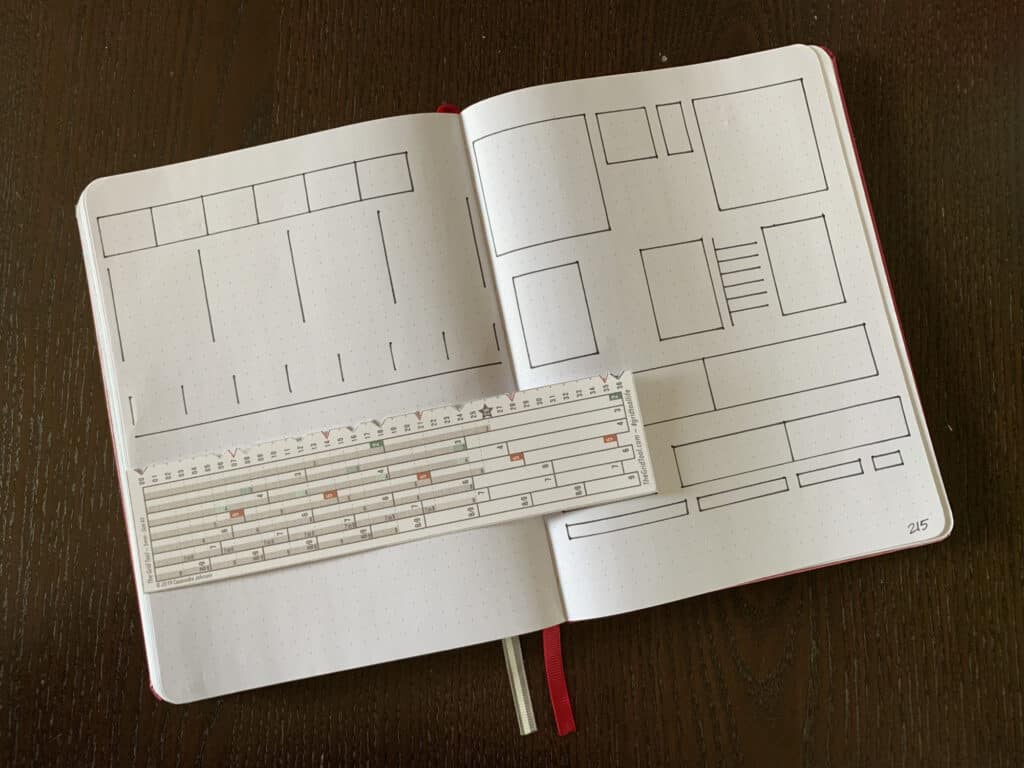
Third: Using the visual demarcations on The Grid Tool as your guides, decide where on the page you want your sections to be.
This is where The Grid Tool is better than counting and calculating or using a grid spacing cheat sheet. Since you can use it on the page like a ruler, you’re free to move it around and test out how your sections will look in different places.
Once you’re satisfied with the placement, start at 00 to make your first mark. Then make marks at each section break. Extend your marks with lines to make rows or columns (TIP: I turn The Grid Tool around and use the long, flat part as a straightedge to draw my lines).
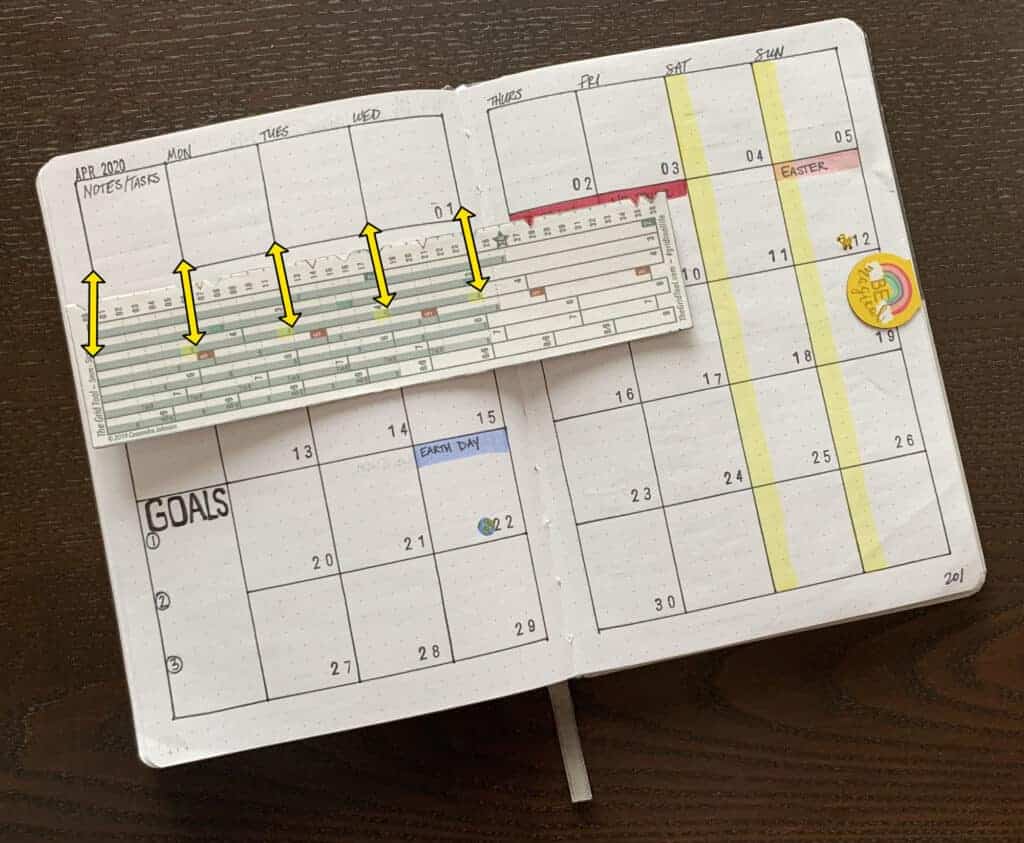
In our monthly calendar example, we can move The Grid Tool left and right on our page until we’re happy with the placement of our four columns. You’ll see how I left a one-space margin on either side to center it on the page.
More Details About Margins
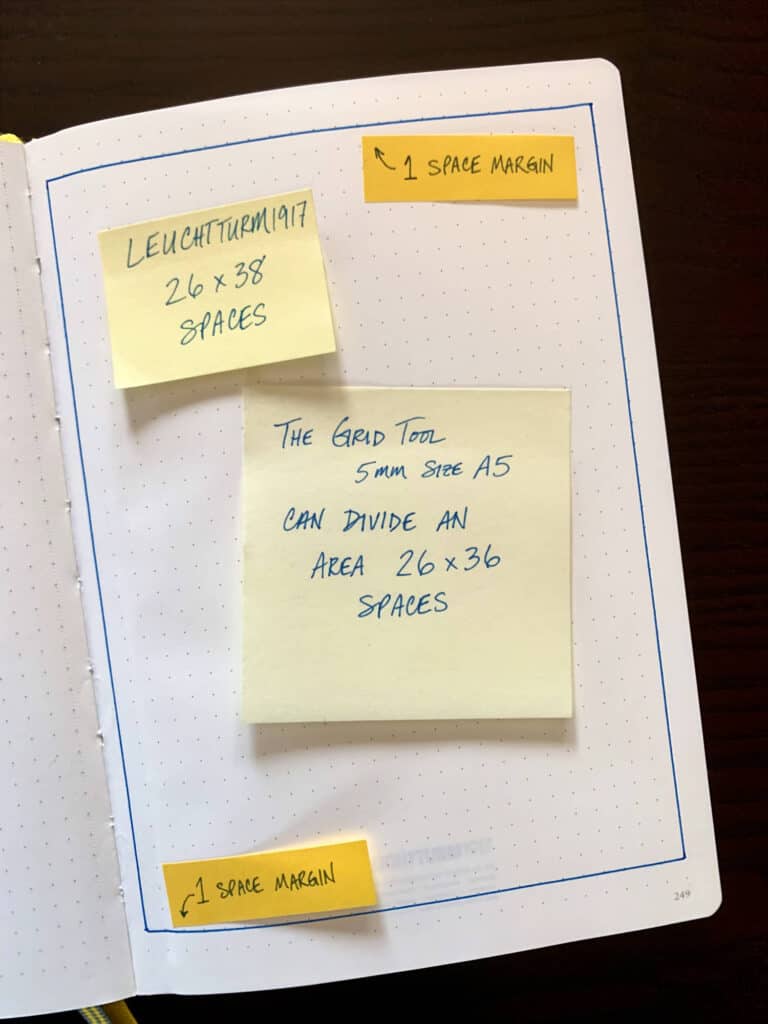
I’ve designed The Grid Tool 5mm ~ Size A5 to divide an area 26 x 36 spaces for maximum compatibility with most standard size A5 journals, planners, and notebooks. Depending on the number of grid spaces in your journal or planner, you may have more or fewer extra spaces than someone with a different brand or size. For example, usingThe Grid Tool 5mm ~ Size A5 in a Leuchtturm1917 A5 dot-grid journal, we’ll have two extra spaces vertically.
If the grid pattern on your page has MORE spaces vertically, horizontally, or both – you have the flexibility to choose whether you want to use those extra spaces to leave a margin:
a.) at the top of your page (for example – for a page title),
b.) at the bottom of your page (for example – for page numbering)
c.) on either side of the page
d.) or in-between your sections
How do margins affect our 2-page monthly spread?
Because we’re adding between 28 and 31 boxes (depending on the month), we want each to have enough writing room for truncated reminders. My handwriting tends to be large, so the more space I can have in each box, the better.
However, you’ll notice in the previous photos of the calendar above (and more below), I left a lot of space on the page in the form of margins.
First, I intentionally decided to stay away from the inner seam between the pages (where it’s hard to write on the page curvature near the binding).
Next, I also wanted to give our calendar some breathing room at the top AND bottom. This means starting our rows a couple of spaces down from the top of the page. When we do, we can title it with the Month. Leaving room at the bottom also allows us to add page numbering.
And finally, leaving a small margin on each side makes it look even and aesthetically pleasing.
What about Rows?
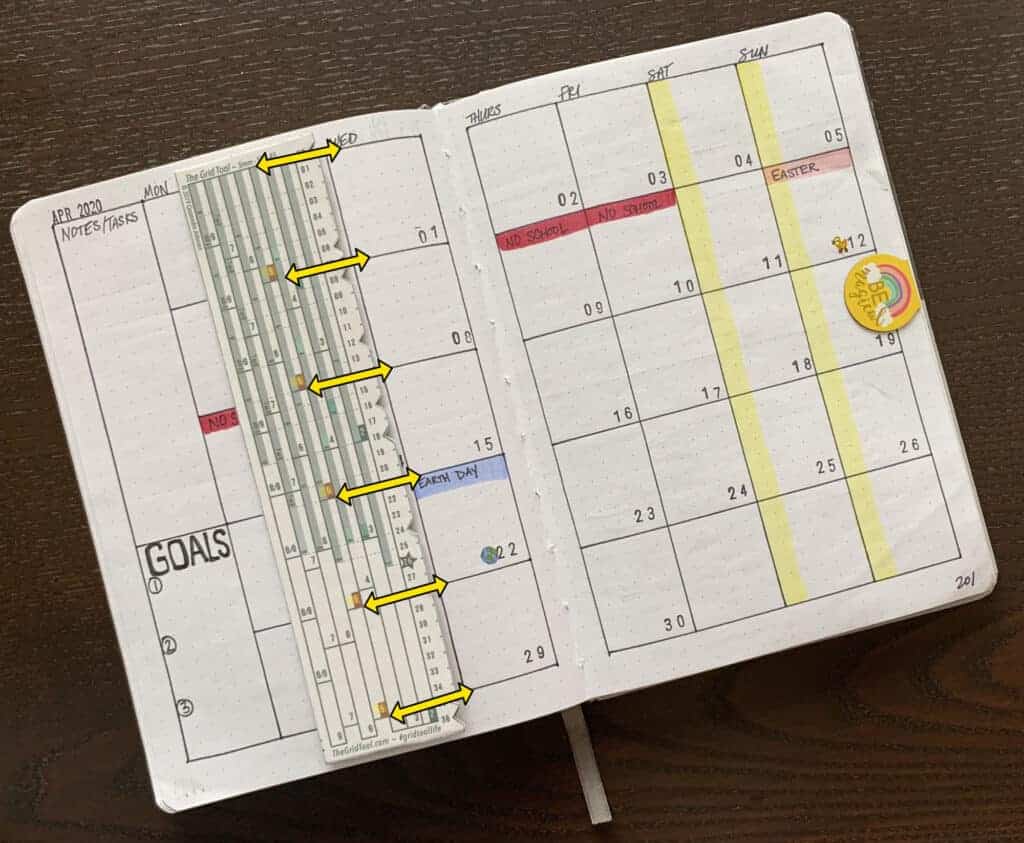
Rows are made using the same 3 steps with one change in orientation. First, we turn The Grid Tool lengthwise. Now the larger ‘row’ numbers are facing upright (the ‘column’ numbers in the shaded sections are smaller and now sideways). You can easily see 5 vertical sections (the 5s are in orange boxes); ready to make 5 weeks of rows.
What’s Missing?
Did you notice what’s missing? How about counting, calculating, and guesstimating?
We didn’t have to do division in our heads or on a calculator. We didn’t have to count the dots across the page. The Grid Tool does all the math, so we can concentrate on getting the job done.
Did you miss doing any of that work? I sure don’t anymore!
If you’d like to make grids the fast, easy way, do yourself a favor. Get The Grid Tool today.